Late to the party as usual, I finally got around fine-tuning my own images with Stable Diffusion XL 1.0 on a free-tier Google Colab using LoRA. Despite many tutorials being available so far, it took a bit of trial and error to get optimal results. I used the SDXL weights from StabilityAI on images of my cat Thor and fine-tuned them using the Dreambooth method which requires only a few (how many is a few?) images of the subject. I chose SDXL because I wanted my photos to have a high resolution (1024x1024). There seems to be conflicting opinions on the best parameters to use for fine-tuning, especially when it comes to objects and not people’s faces. Many blogs, tutorials, papers, etc., suggested using prior-preservation when fine-tuning on images of pets, whereas other resources insisted prior-preservation is redundant for anything except human faces. Some tutorials suggest that a 200-400 training steps should be sufficient for animals, but I found that 500-1000 steps give better results.
Input data
In order to start training we need the following:
- the Diffusers libraries
- the SDXL Dreambooth Python script and README
- at least 16 GB of VRAM (because I am GPU poor, a free Tesla GPU T4 in my case from Google Colab)
- 10 - 15 images of your subject in various poses, lighting, backgrounds, angles - as much variety as possible of the subject.
Although the original Dreambooth paper mentions using 3-5 images from my experience and others the optimal number is around 10-15 images of the subject. I used 15 images of Thor in various poses with various backgrounds. As we can notice, Thor is mostly centered in the photos and there are no other pets (his brother) or objects. If the photo is cluttered with othe objects, humans, pets, etc Dreambooth will not be able to learn the unique subject we are training to fine-tune. Speaking of unique, the principle of Dreambooth is using an unique token (word) associated with the subject to be injected in the “dictionary” of the model during the fine-tuning process.This is called the instance_prompt and can be something like "a photo of <TOK> cat", where TOK is my unique identifier describing Thor. The word describing the generic class noun of the subject (i.e. cat in this context) is also needed for better results.
 Training images of my cat Thor taken in various poses with different background.
The motivation behind linking the unique identifier <TOK> with a class noun CAT during training is to leverage the model’s strong visual prior of the subject’s class. In other words, it will be much easier for the model to learn what Thor looks like if we tell it that it is a cat and not a handsome Marvel actor. The DreamBooth paper mentions that including a relevant noun in the training prompts decreased training speed and increased the visual fidelity of the subject’s reproduced features.
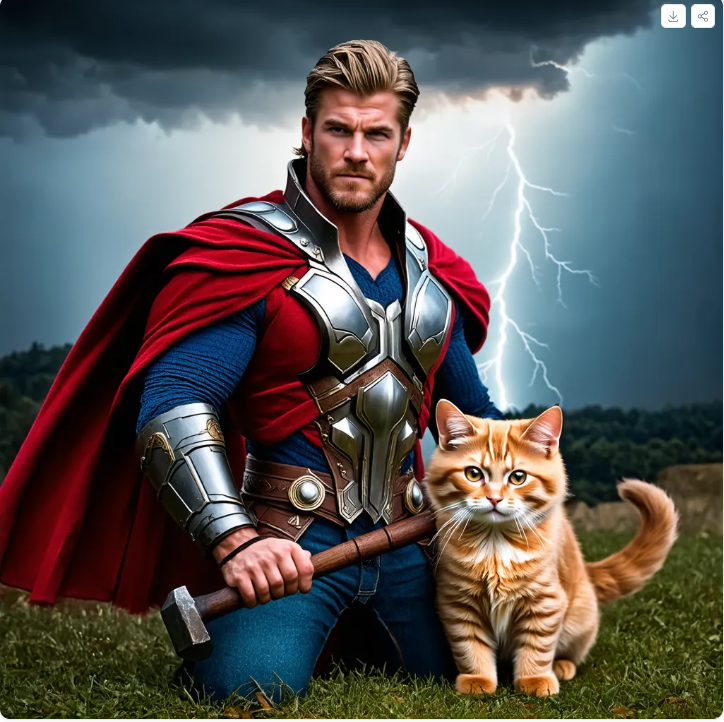 Wrong Thor, I guess?. Photo generated with Stable Diffusion 3, prompt: “a photo of Thor Marvel actor with an orange cat and his hammer, lighting and storm in the background”
However, there are still two issues we must address before we can fine-tune the model according to the Dreambooth paper:
-
Language drift : Language drift refers to the catastrophic forgetting of a large language model that has been trained on a larget amount of data that simply “forgets” the syntactic and semantic meaning of an object when fine-tuned. In simpler words, the model forgets what a cat looks like and will start generating bananas instead
-
Reduced output diversity: This means that the model will learn to reproduce the subject with high accuracy, but mostly in the poses and contexts present in the training images.
To solve this issue, the authors of the Dreambooth paper introduce “prior-preservation” which addresses the 2 issues that happen when training one such a small sample of data. The idea is to supervise the fine-tuning process with the model’s own generated samples of the class noun, in our case “cat”. These prior-preserving images are sampled and labeled using the [class noun] prompt. This helps the model remember what a generic member of the subject class looks like. The authors recommend sampling a number of 100 × 𝑁or 200 × 𝑁 [class noun] images, where 𝑁 stands for the number of images of the subject. I used 15 images and 100 steps, so in total I trained with 1500 steps.
Tips and tricks
- use 10-15 photos of your subject (not 3-5 like the paper suggests).
- same photo size and square ratio: Although not specifically required, I noticed I get much faster and better results when the photos have a square ratio and the same size. I added the option to re-size the photos programmatically in Google Colab.
- use a low learning rate (1e-4, 1e-6) for animals and humans.
- monitor the training to see where the sweet spot is for
max_train_steps: Dreambooth tends to overfit quickly, too few steps and your cat looks like any generic cat, too many steps and your cat looks like Cerberus. I used--validation_prompt,--validation_epochs, and--checkpointing steps. Additionally you can use Weights & Biases to see how your training progresses and your model learns. Started withmax_train_steps=400and gradually increased. - train without class prior-preservation option first as this requires more memory and training takes longer. My results were slightly better with the parameter
--with_prior_preservation, but when I tried to increase mymax_train_steps=2000I ran into memory issues.
The first 2 photos are from the validation run in Weights & Biases. You can see at step 0 the model has no idea how Thor looks, but it outputs generic photos of cats. Whereas at step 300, the photos already start resembling Thor and at step 500 is clearly Thor (with minor artefacts.)


Hyperparameters used for SDXL
To be able to run SDXL on a free tier Google Colab, the following hyperparameters are needed:
- Gradient checkpointing (
--gradient_accumulation_steps) (the higher the value the lower the memory load) - 8-bit Adam (
--use_8bit_adam) - Mixed-precision training (
--mixed-precision="fp16")
HuggingFace has already a great notebook example here. I changed this notebook because I wanted a more user friendly interface (e.g. choosing my folders, files, prompt), I didn’t want to save my model to the hub, but I wanted to save my photos locally in my GoogleDrive. Also, I added a function to resize my photos - this is needed in particular if you want to run other version of Stable Diffusion which only accept square sizes of 512 or 768 pixels.
Without prior-preservation
!accelerate launch train_dreambooth_lora_sdxl.py \
  --pretrained_model_name_or_path="stabilityai/stable-diffusion-xl-base-1.0" \
  --pretrained_vae_model_name_or_path="madebyollin/sdxl-vae-fp16-fix" \
  --instance_data_dir="$source_data_dir" \
  --output_dir="$output_dir" \
  --instance_prompt="$instance_prompt" \
  --resolution=1024 \
  --train_batch_size=1 \
  --gradient_checkpointing \
  --gradient_accumulation_steps=4 \
  --snr_gamma=5.0 \
  --checkpointing_steps=100 \
  --learning_rate=1e-4 \
  --lr_scheduler="constant" \
  --lr_warmup_steps=0 \
  --max_train_steps=500 \
  --validation_prompt="$validation_prompt" \
  --validation_epochs=25 \
  --report_to="wandb" \
  --mixed_precision="fp16" \
  --use_8bit_adam \
  --seed="0"
With prior-preservation
    !accelerate launch train_dreambooth_lora_sdxl.py \
      --pretrained_model_name_or_path="stabilityai/stable-diffusion-xl-base-1.0" \
      --pretrained_vae_model_name_or_path="madebyollin/sdxl-vae-fp16-fix" \
      --instance_data_dir="$source_data_dir" \
      --output_dir="$output_dir" \
      --instance_prompt="$instance_prompt" \
      --with_prior_preservation \
      --class_data_dir="$class_dir" \
      --prior_loss_weight=1.0 \
      --class_prompt="photo of cat" \
      --num_class_images=100 \
       --max_train_steps=1000 \
      --resolution=1024\
      --train_batch_size=1 \
      --gradient_checkpointing \
      --gradient_accumulation_steps=2\
      --snr_gamma=5.0 \
      --checkpointing_steps=100 \
      --learning_rate=1e-4 \
      --lr_scheduler="constant" \
      --lr_warmup_steps=0 \
      --validation_prompt="$validation_prompt" \
      --validation_epochs=25 \
      --report_to="wandb" \
      --mixed_precision="fp16" \
      --use_8bit_adam \
      --seed="0"
Results
All in all my results were pretty good with and without prior-preservation. When doing inference, I noticed that I get better results when my number of inference steps are around 80-100. Otherwise Thor looks quite distorted, has extra limbs or is simply another cat. SDXL was also unable to render Thor wet swimming underwater as in the tutorial they showed with the dog photos. Another thing that I noticed is that SDXL really strugles with complex prompts, unlike Midjourney. Every time I wanted to add several elements and be super specific about where Thor should be placed and how he should look like the model outputed gibberish. Moreover, as you probably noticed Thor is wearing a collar with AirTag but the model completely failed to render this in any instance. It could also be my fault for mixing photos of Thor with a red collar and blue collar. Perhaps I should have trained it on photos of Thor without the collar? Next time.
Useful resources:
HuggingFace Training Stable Diffusion with Dreambooth using 🧨 Diffusers:
Stable Diffusion XL HuggingFace card:
A community derived guide to some of the SOTA practices for SD-XL Dreambooth LoRA fine tuning:
Amazing comprehensive tutorial from Tryolabs:
AWS Blog on fine-tuning Stable Diffusion on Sagemaker:
Python Script if you have the resources to run Stable Diffusion locally (I don’t, I am GPU poor.)
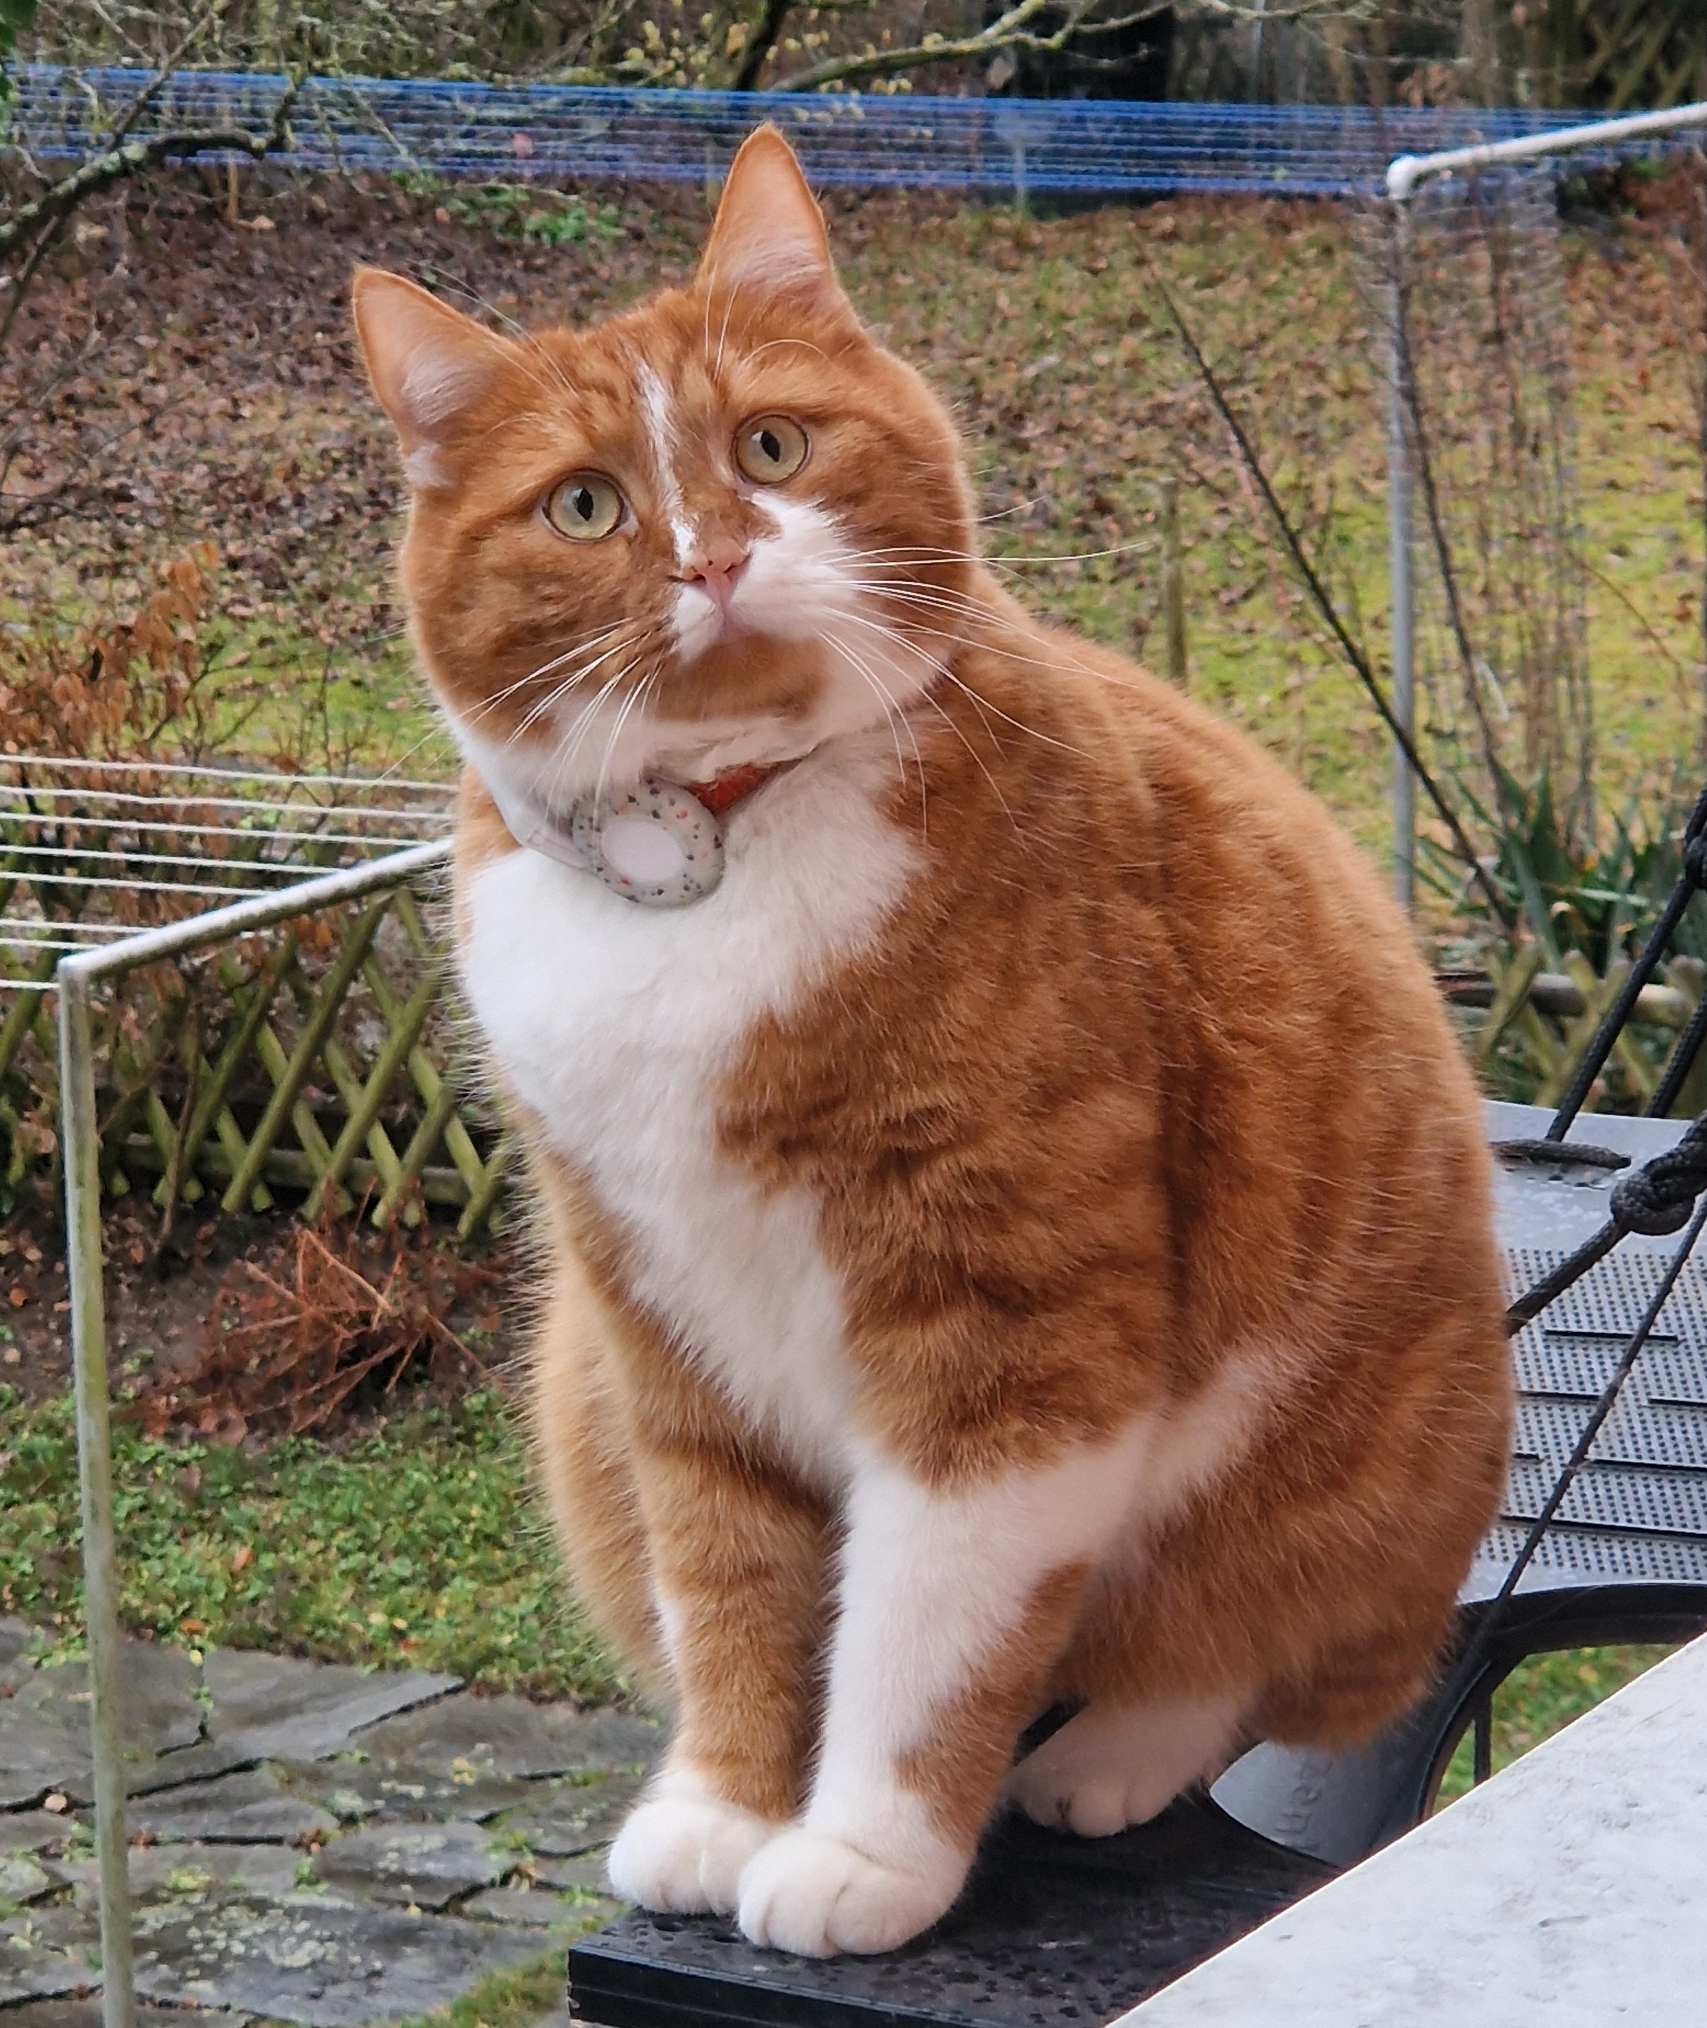 The original Thor on the outdoors ladder.
With prior-preservation:
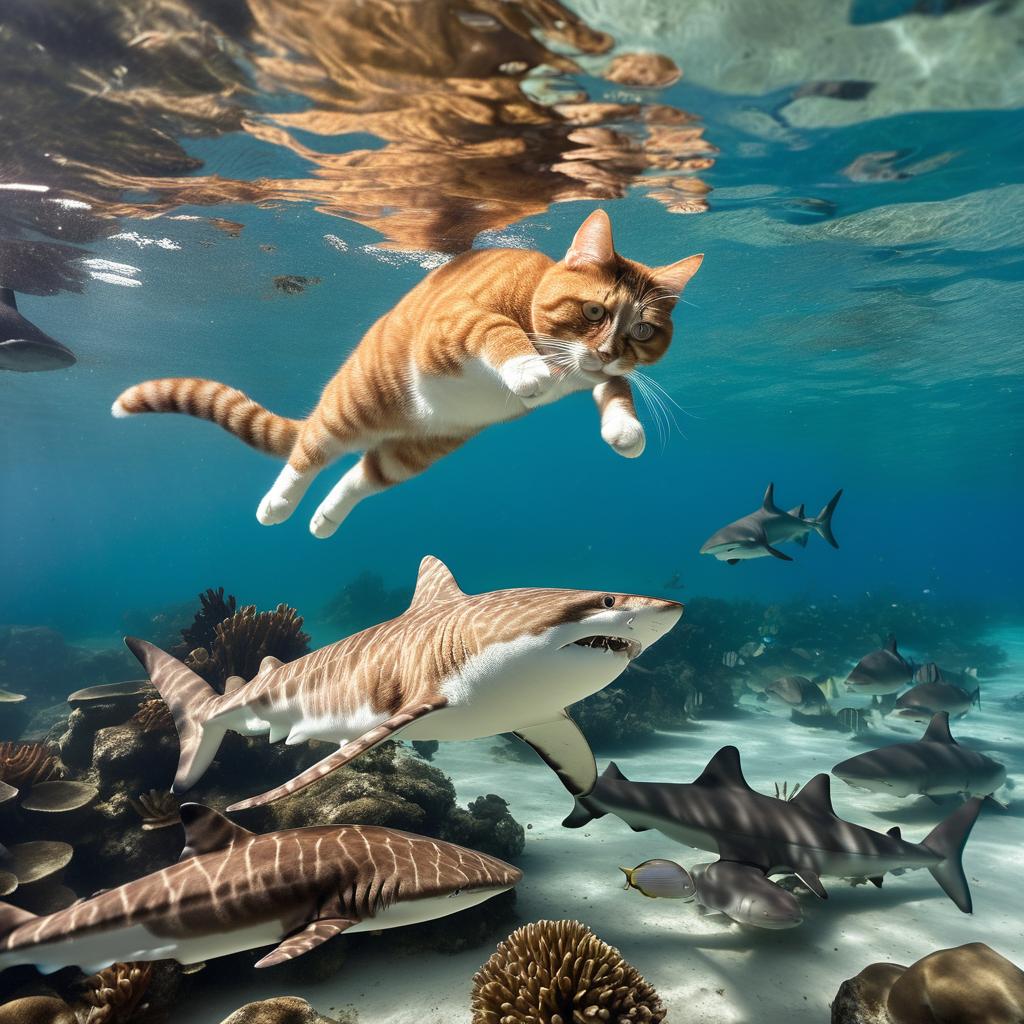 Prompt: photo of TOK cat swimming with sharks and marine animals
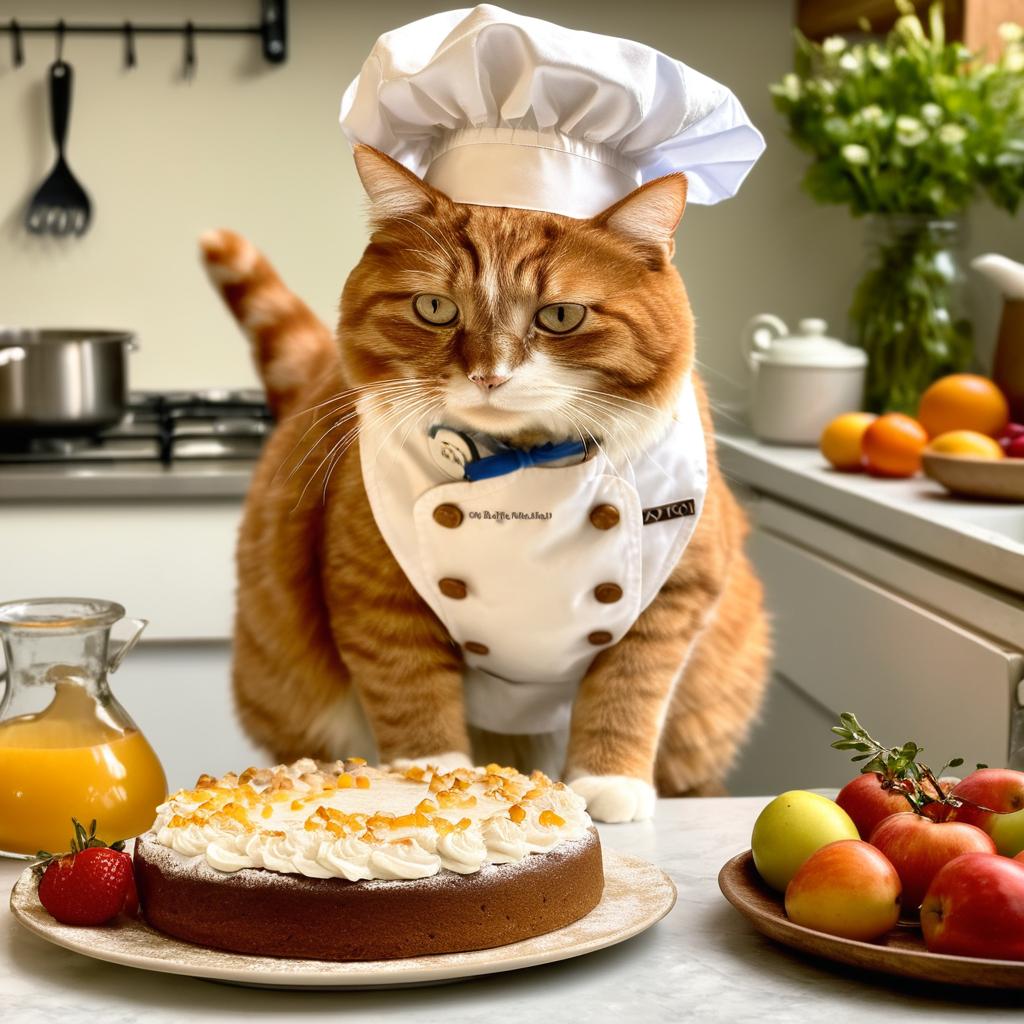 Prompt: photo of TOK cat baking a cake wearing a chef hat and an apron.
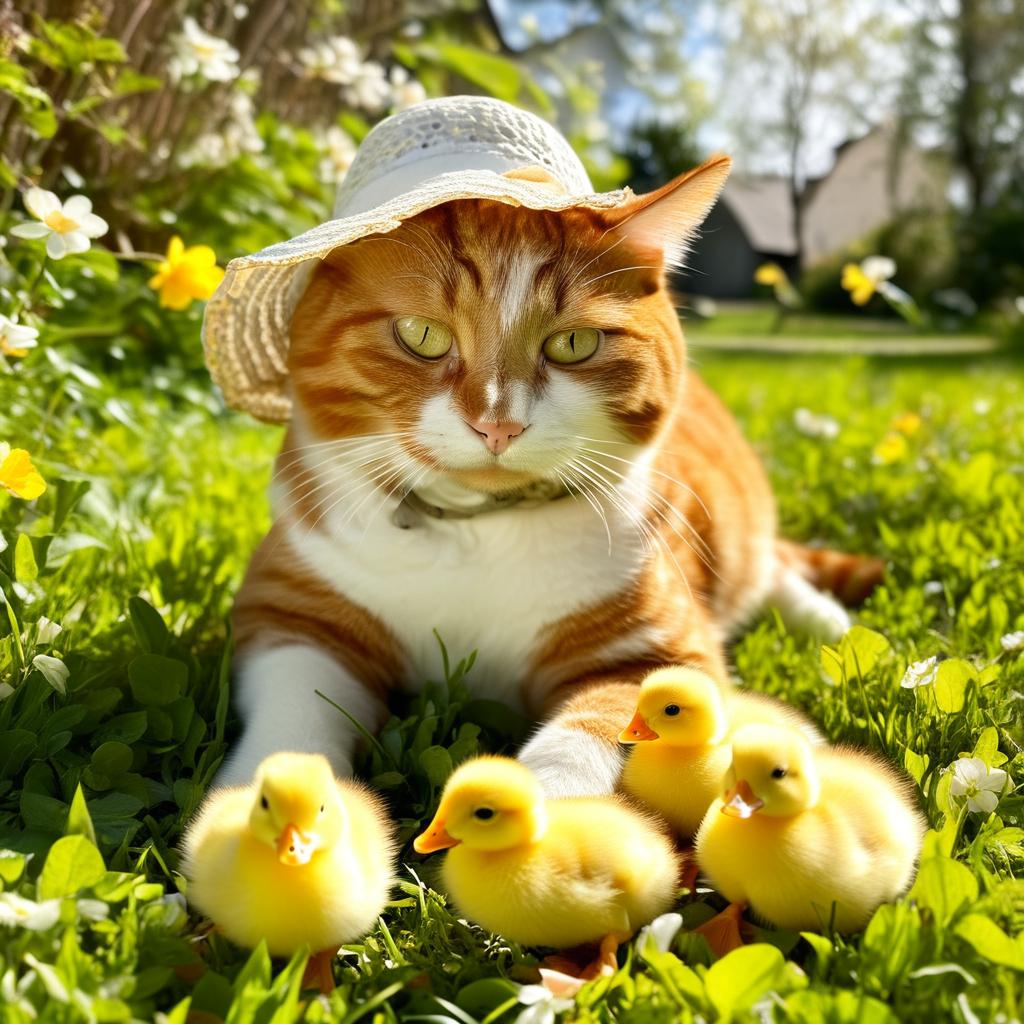 Prompt: photo of TOK cat wearing a bonnet in the grass surrounded by yellow ducklings.
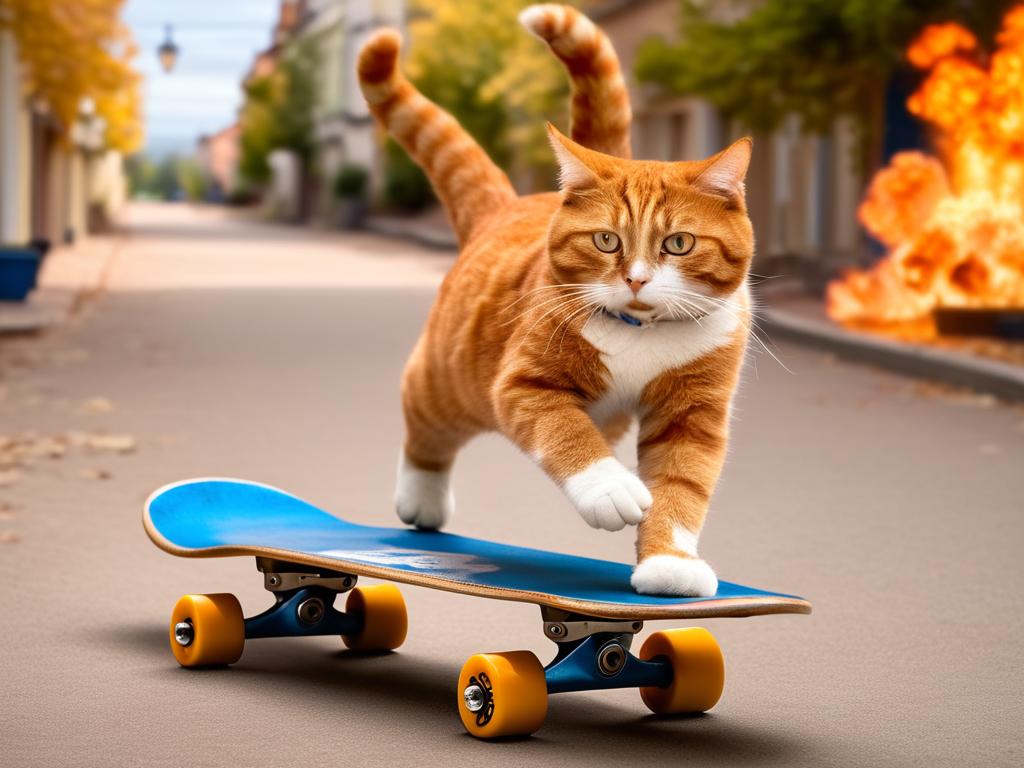 Prompt: photo of TOK cat on a skateboard, running away from an explosion, mission impossible
Without prior-preservation:
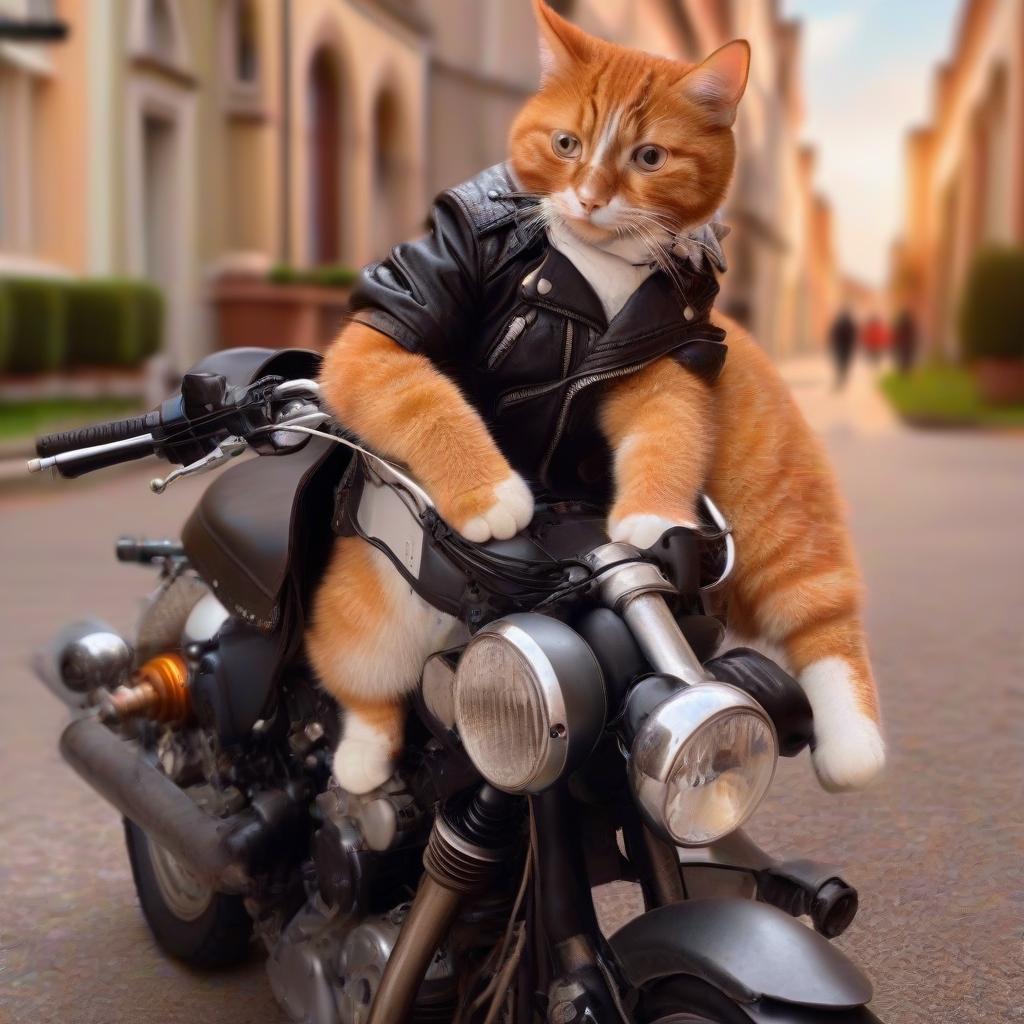 Prompt: photo of TOK cat riding a motorcycle, wearing a black leather jacket.
 Prompt: photo of TOK cat dressed as a laywer, surrounded by letters in an office.
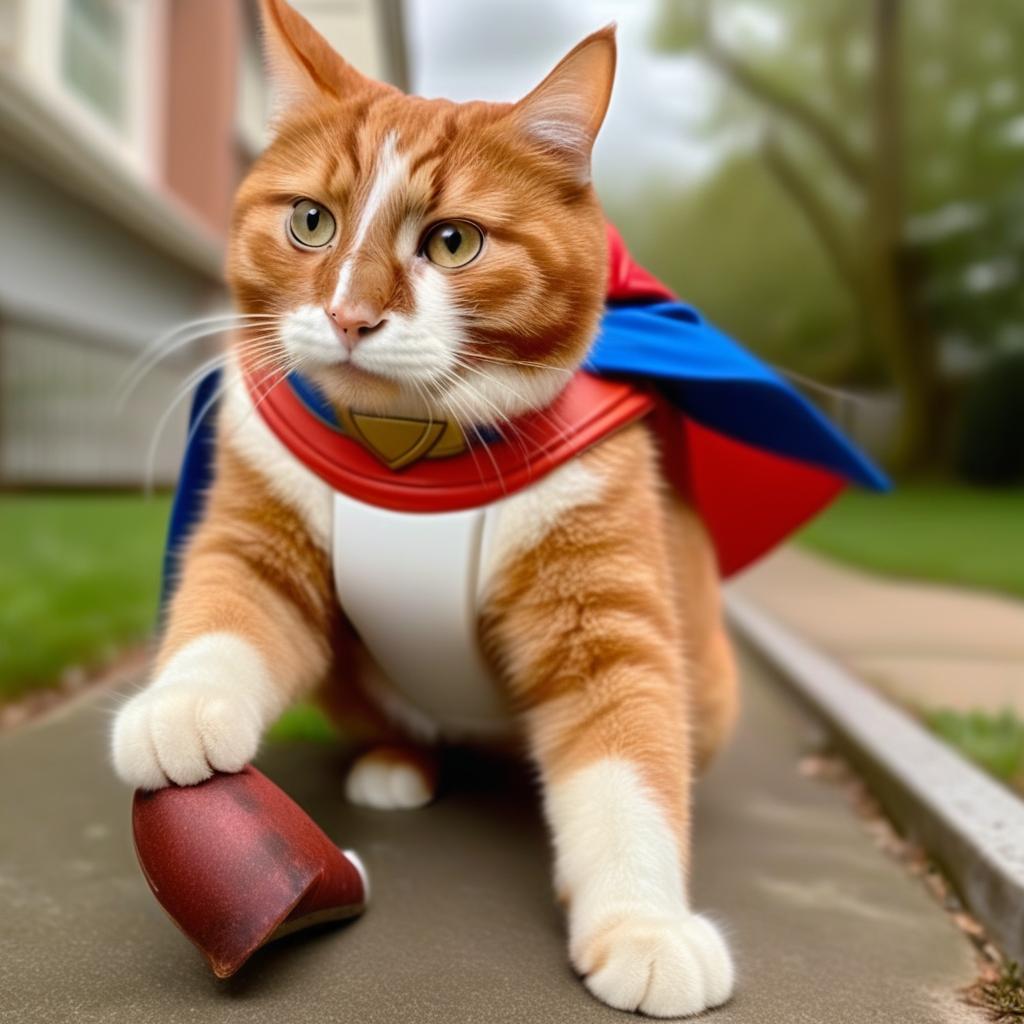 Prompt: photo of TOK cat dressed as a Superman.